
Upon watching Ringway Manchester’s video on the YiNiTone B5 handheld network radio and subsequently finding out it runs Android and only costs £45, I just had to get my hands on one, even if it’s only to tinker and not to properly use.
Fast forward just over a week, I have one in my hands, running EchoLink instead of the default Zello. It is by no means perfect, and if you turn it off or let it run flat you’ll need to connect it to your computer to at the very least kill the Zello app again (explained further below) but I think it is a good start and leaves plenty of room for people more knowledgeable than myself to expand upon!
So what is this thing, anyway?
The little radio, which is plastered all over AliExpress and BangGood under varying different brands with common marketing materials, is essentially just an Android tablet (not phone, no text or phone app) with a data SIM in a radio form factor which has additional hardware buttons accessible to the OS.
Specs
- 512MB RAM
- 1GB Flash Storage
- Qualcomm MSM8909 CPU
- 2/3/4G Networking
- 2.4GHz WiFi
- Android 5.1.1 (unrooted, developer mode on by default)
- Security Patch Level 2016-06-01
- Build Number T56
- Kernel 3.10.49 built Tue 8 Oct 2019 @ 17:43:51 CST
- Baseband LANSUS1-L809V0.02.01
- 160×128 colour LCD without touch
- External antenna for 4G
- Hardware PTT
- 6800mAh battery pack with provision for docking cradle (not included)
- Front facing loudspeaker and mic
Teardown
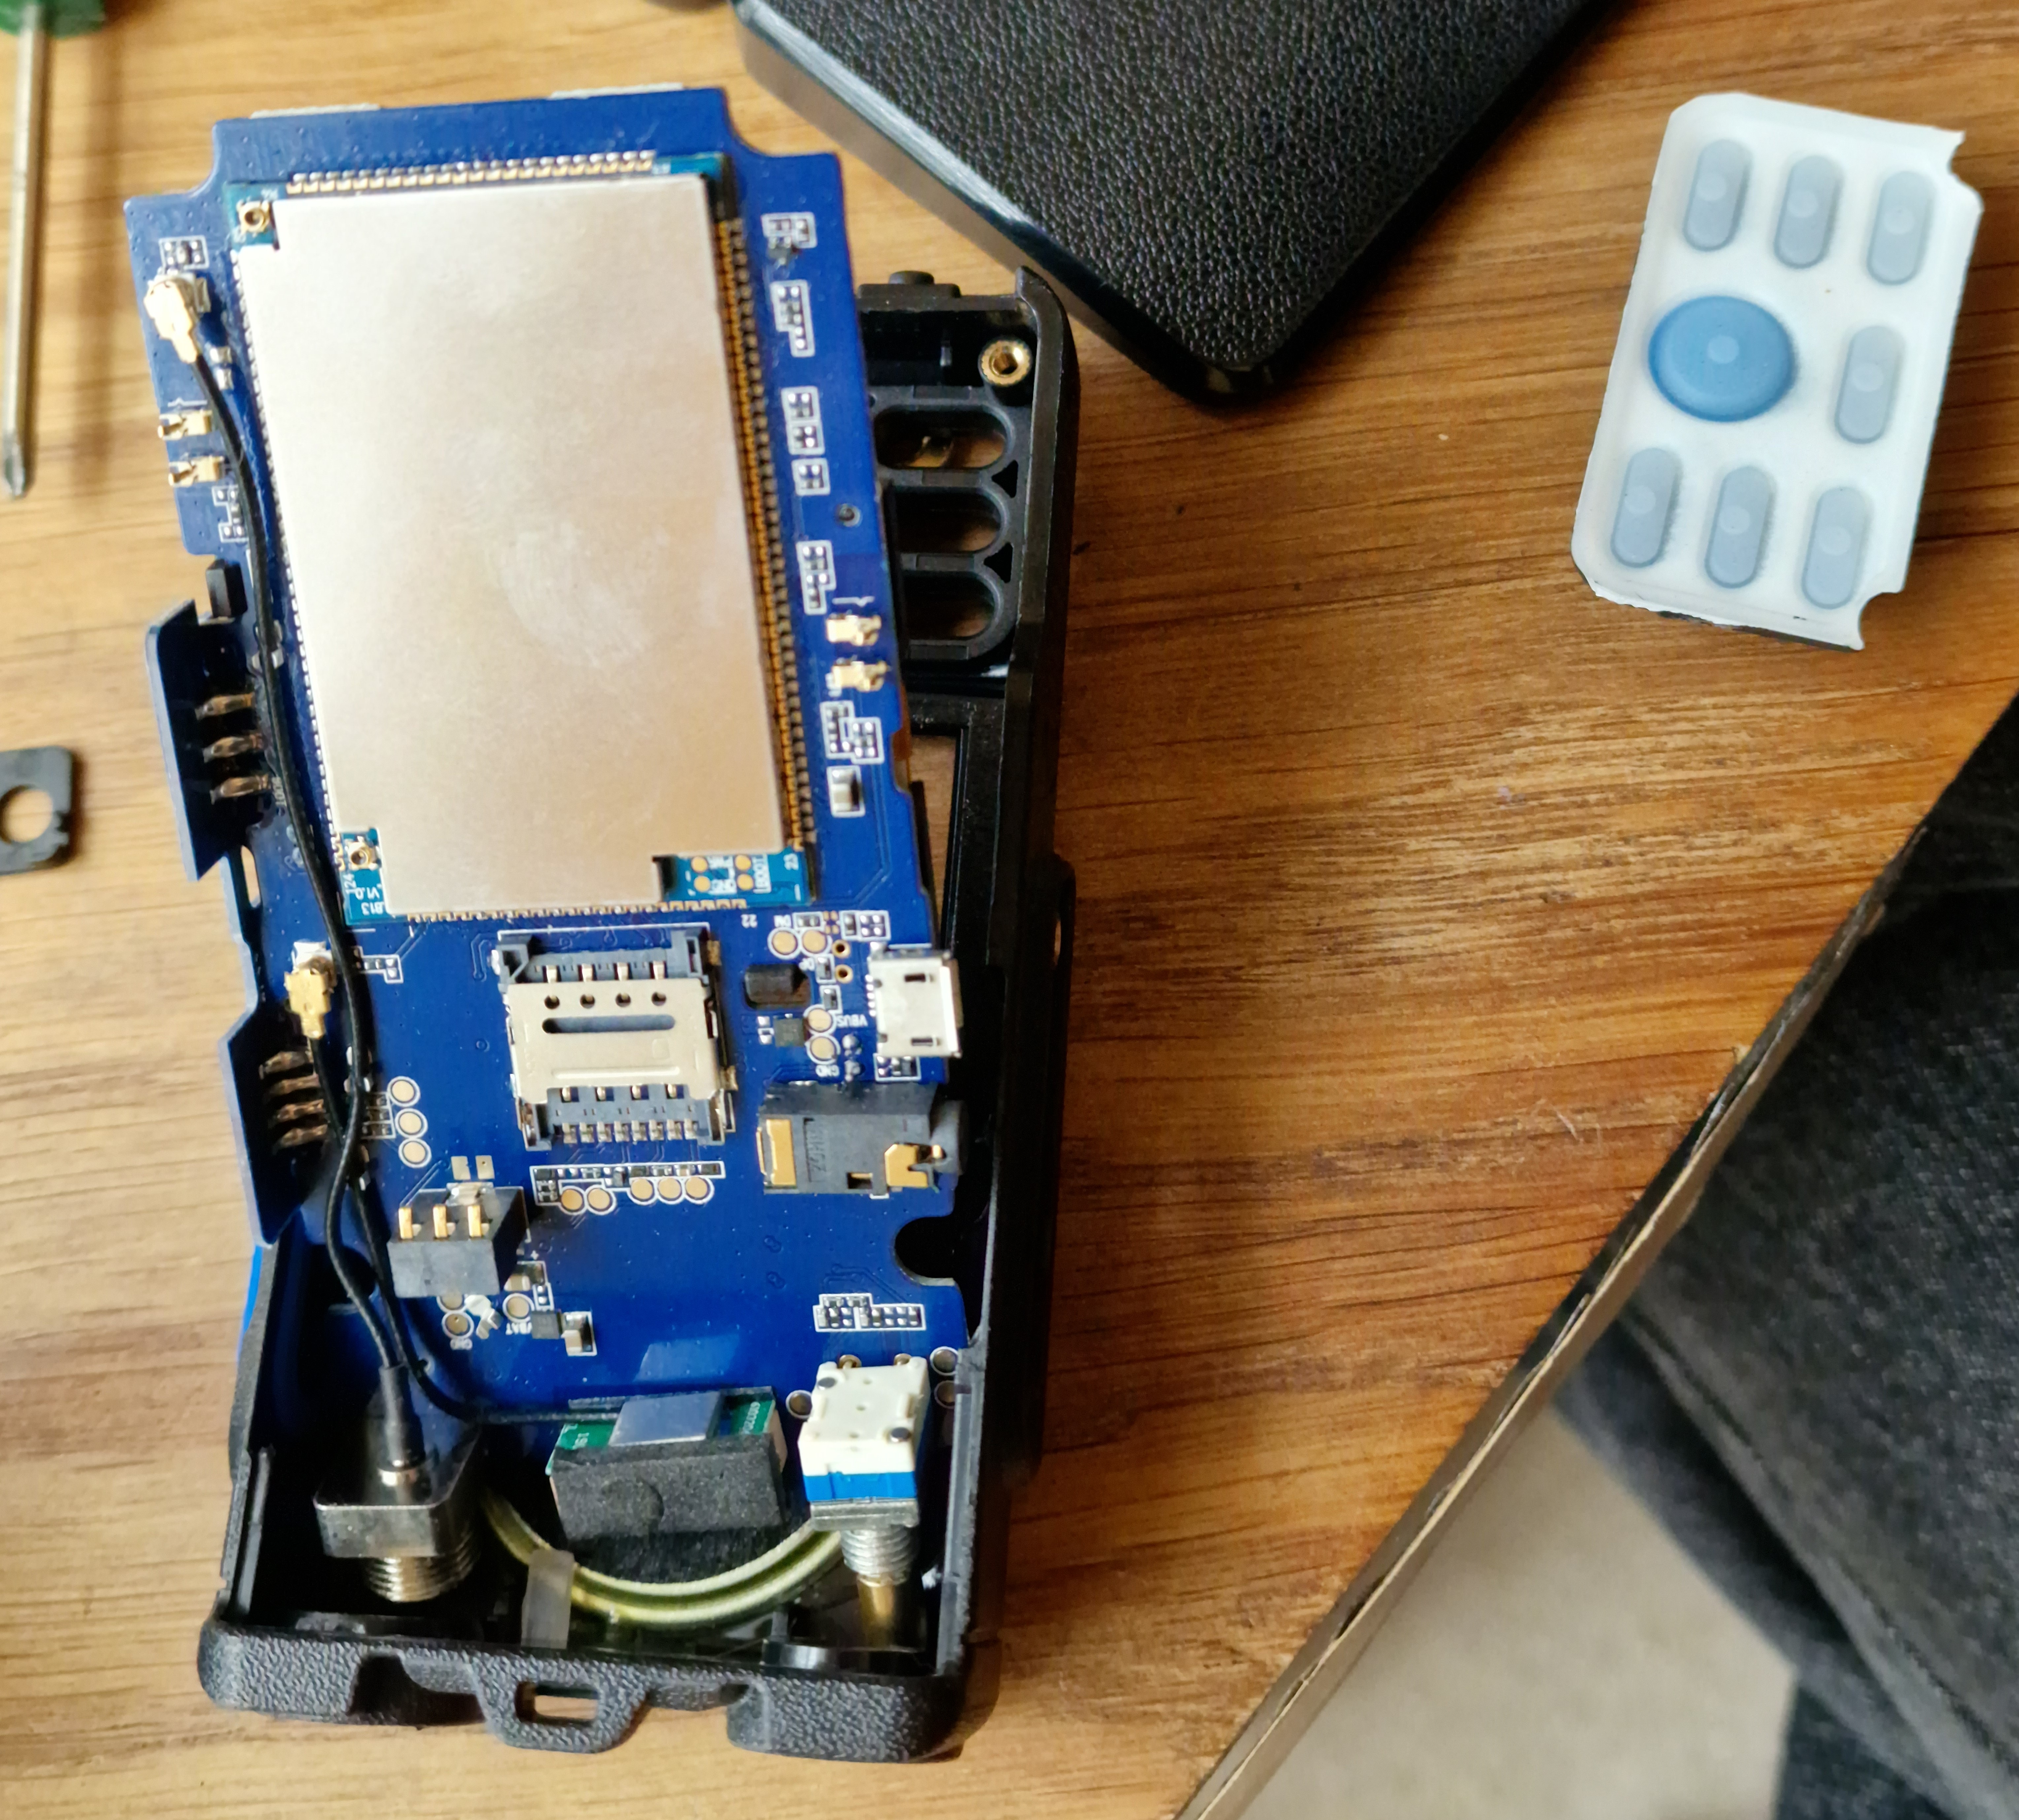
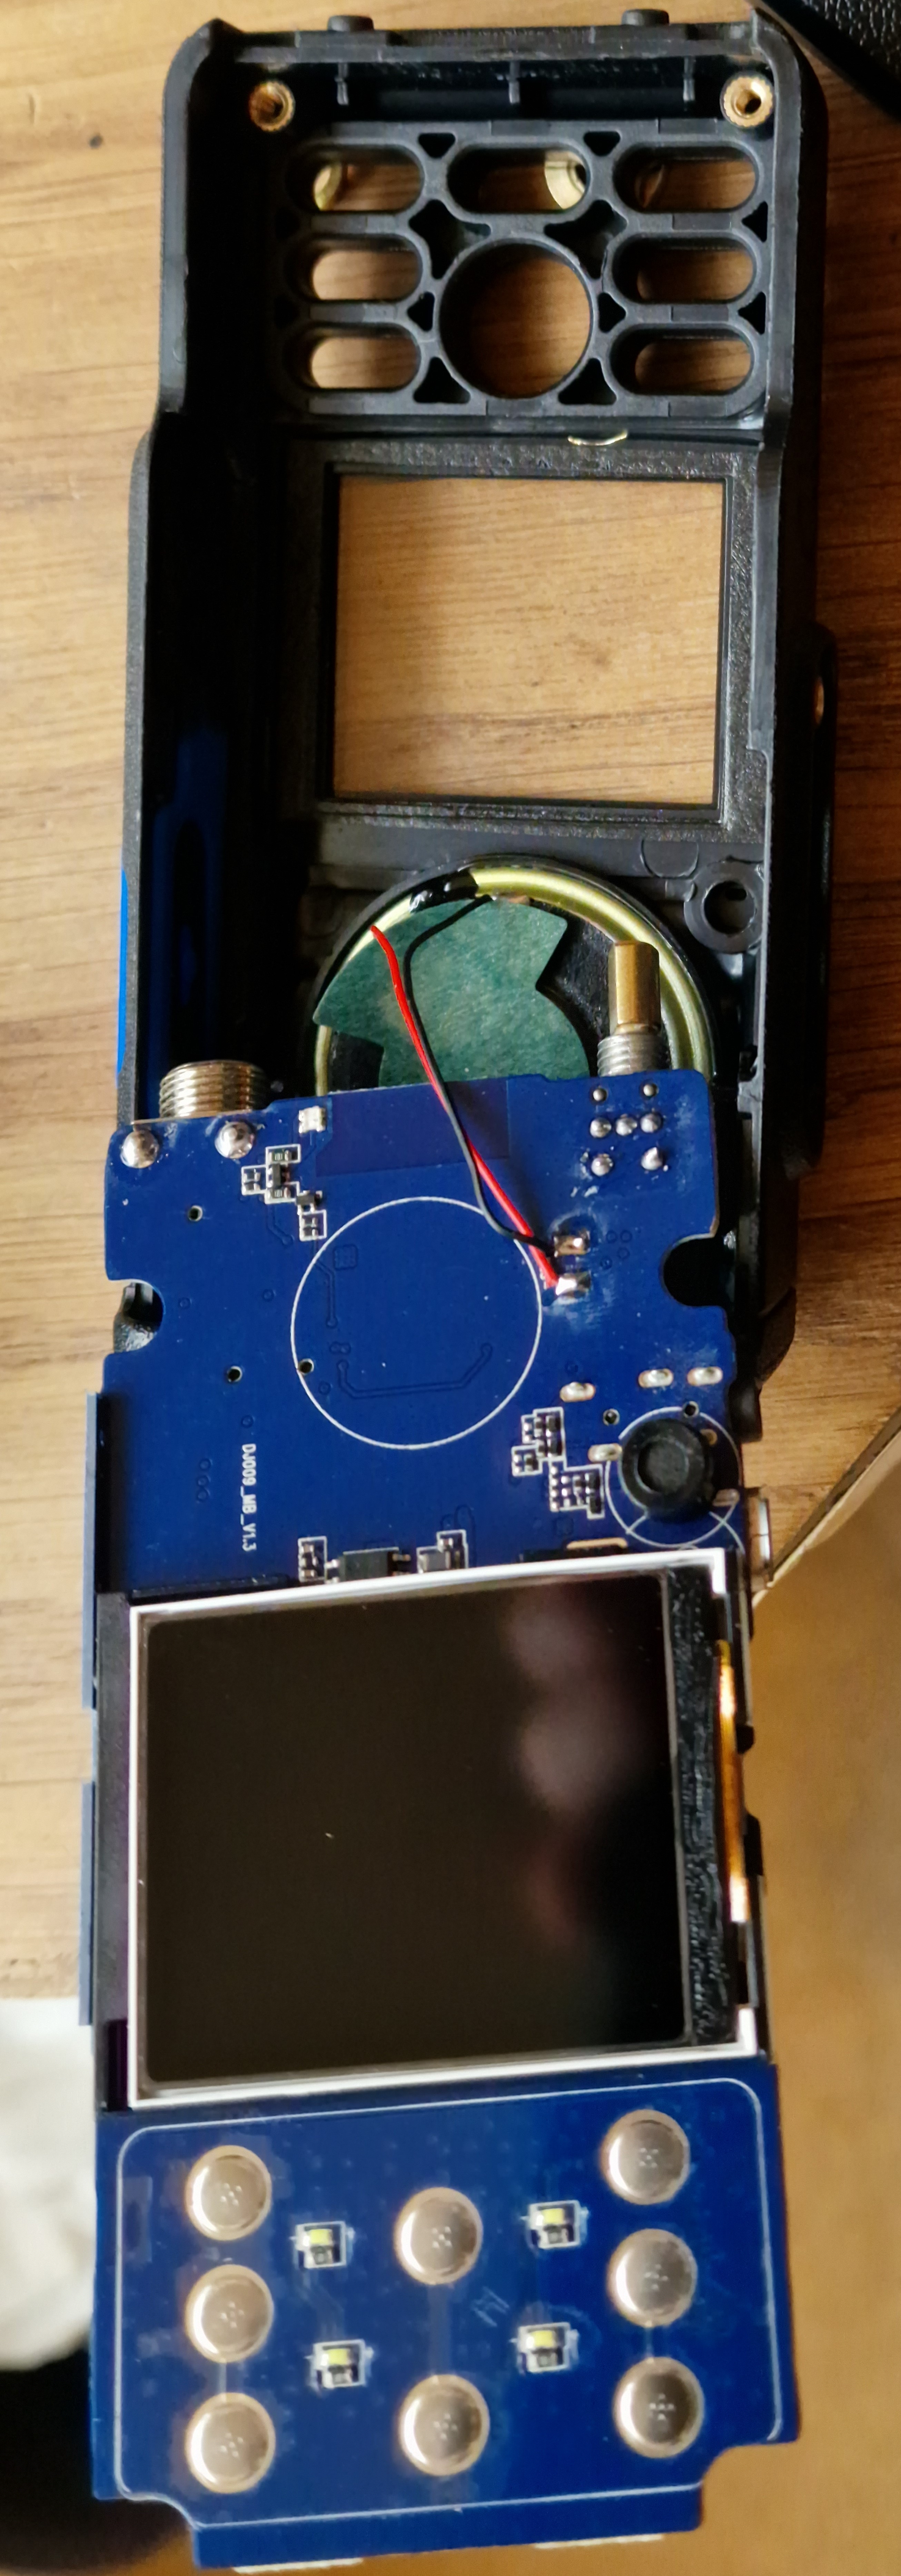
I didn’t do a proper full teardown of this unit, but I did happen to take some pictures whilst I was cleaning the LCD internally. I noticed also that the back case has some metal tape on it which makes contact with two pins on the board in two places (top left and centre right on the first picture) and although opening the radio with the power disconnected and reassembling did not kill it, I would not trust trying to power the radio on without these contacts connected. Could be a self-killing feature but I am not about to test.
Marketing and Branding
I have seen this radio advertised across AliExpress and BangGood under various brand names using the same marketing. Internally, the radio calls itself the ZX, however the external branding variations I have spotted are:
- Vtesping B5
- Vtesping WG-98
- YiNiTone B5
- Camoro K25
- HamGeek HG-369
- Kereia V597 Plus
- Anysecu T56
- Koleeg KLJ-910
- KSUN ZL10
- Just completely unbranded
Accessing via USB
When connected to a PC, the radio does not present itself as a media storage device like many Android devices do. This means you cannot see the contents of the Android directories nor the storage available.
The USB cable the radio comes with is only for power, not data. If you plug the radio into a PC with the stock cable, the radio will charge but it will not connect. Use a different known-working USB cable to connect the radio to your PC and you will find it makes a connect sound but presents no storage medium.
Required Software
In order to access the radio over USB, we will be using ADB (Android Debug Bridge). This requires developer mode on the radio to be turned on, but conveniently it is already on for us by default.
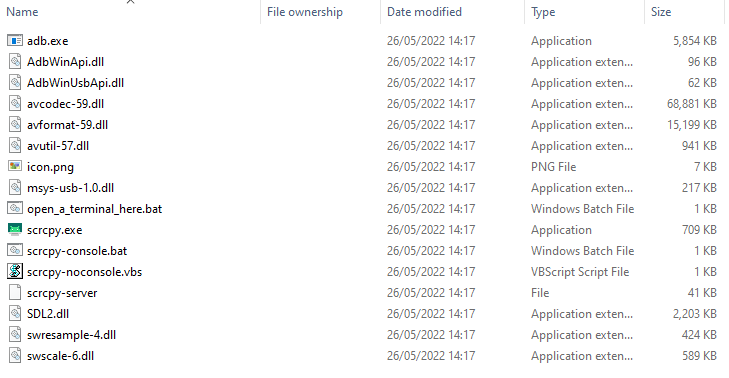
No additional drivers are needed for this process. You only need the scrcpy software which includes all the tools you’ll need to complete all the customisations in this guide. You can download the latest stable version of scrcpy from here https://github.com/Genymobile/scrcpy/releases
Once extracted, the contents of the scrcpy folder should look like so:
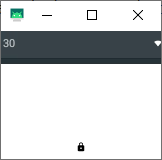
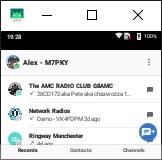
The first thing to do to test your setup is to launch the scrcpy.exe which should after a few seconds pop open a command prompt window and then a display which mirrors that of your radio:
You can interact with this display using your mouse and keyboard, just like you would any Android device, just over your PC! Immediate things to note here are that you can grab the black bar at the top and pull down (you may need to do this twice) to access the system toggles, something usually inaccessible when using the radio’s keypad:
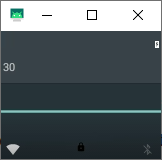
Just pull in the opposite direction to hide this menu again.
Adjusting the Screen Size
As you can see above, everything is very cramped. This is due to the very small 160×128 LCD panel of the radio. It is in fact possible to adjust the screen resolution so that you may see more on the screen and things will be less cramped, however I must note that this comes at the comprimise of quality. The more you try to fit on a screen with few pixels, the more fuzzy it is going to look! For me, this is okay as I only want to do basic navigation and not much reading, but for others this could be an issue.
First of all, go back to your list of scrcpy files, and in a blank space in the file explorer (not on top of a file) hold SHIFT and right click to open the expanded context menu:
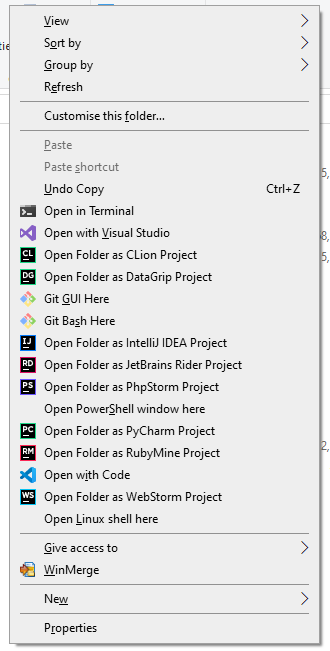
As you can see, I have a lot of menu options. You probably won’t have as many! The one you want to click is Open PowerShell window here :
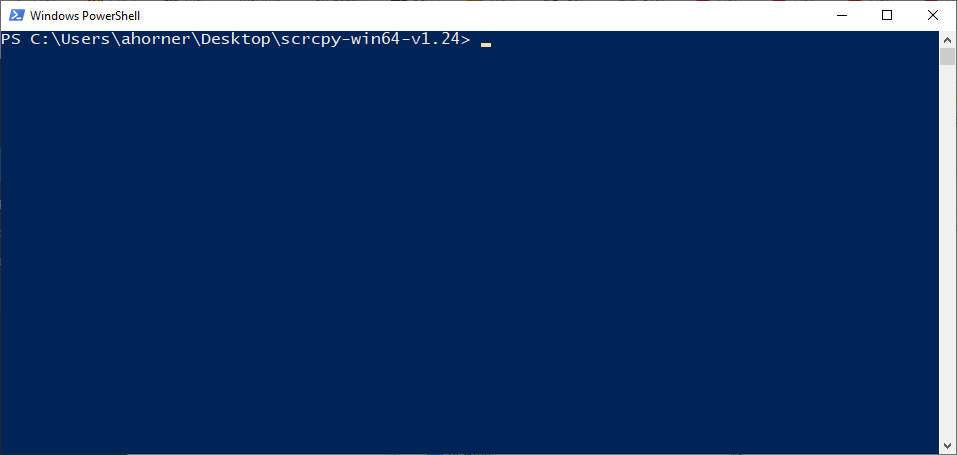
Now, don’t be put off by the command prompt in front of you! All the steps you need to take are documented here for you. The first thing to do is tell ADB that you want to connect over USB, like so:
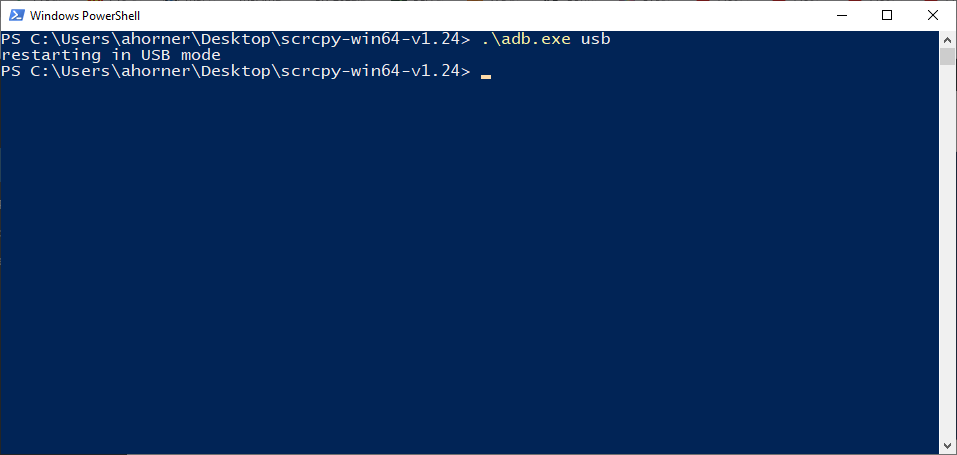
Then we want to log into the command prompt of the radio like so:
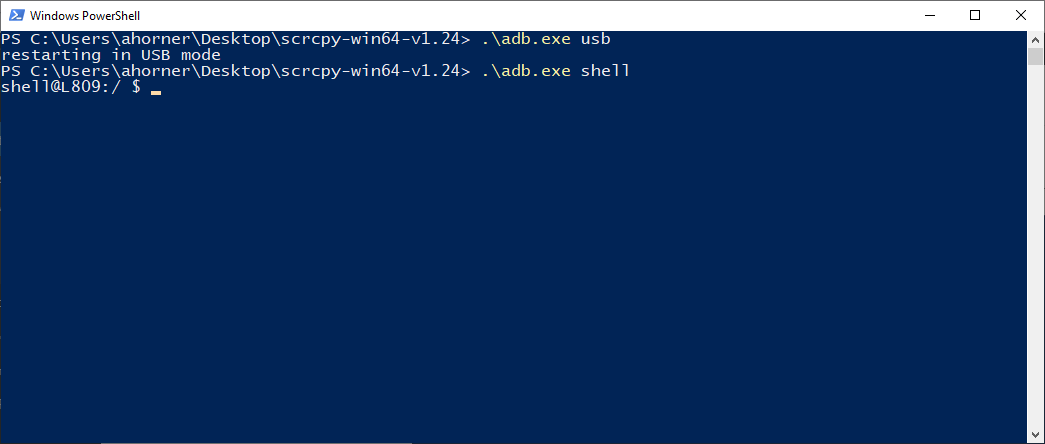
Now we’re in the radio command prompt, we can use commands to change the screen resolution. My preference is to keep the resolution the same and instead change the display scaling to fit as much as possible on the display, like so:
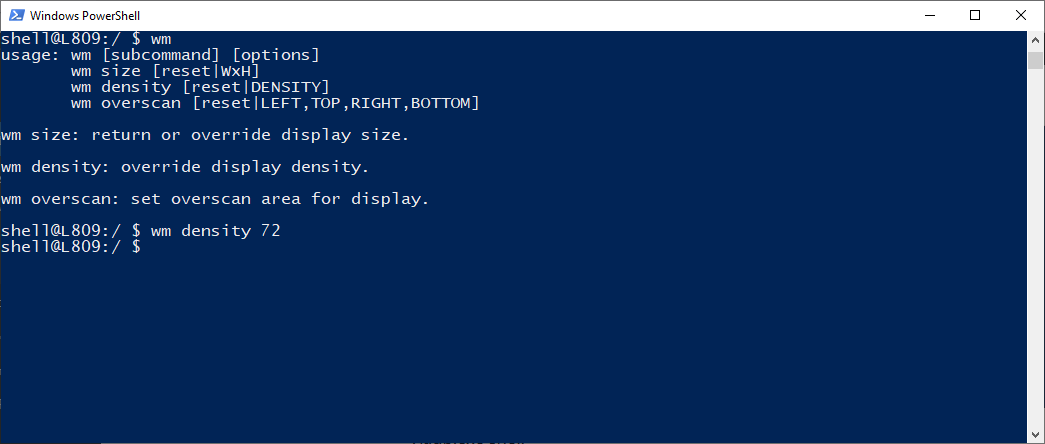
As you can see, 72 is the density (scaling) I chose. I could also do wm density reset as the instructions say, or I could change the screen size with wm size WxH and example being wm size 1920×1080 and of course I can also reset again with wm size reset .
The reason I prefer to set density instead of size, is because size seems to bug out when restarting the device sometimes. It will ignore what you set but try to size the contents of the screen anyway, cutting everything off. Density seems to consistently work fine though!
You can type exit to exit your radio command prompt and return back to the PowerShell command prompt:
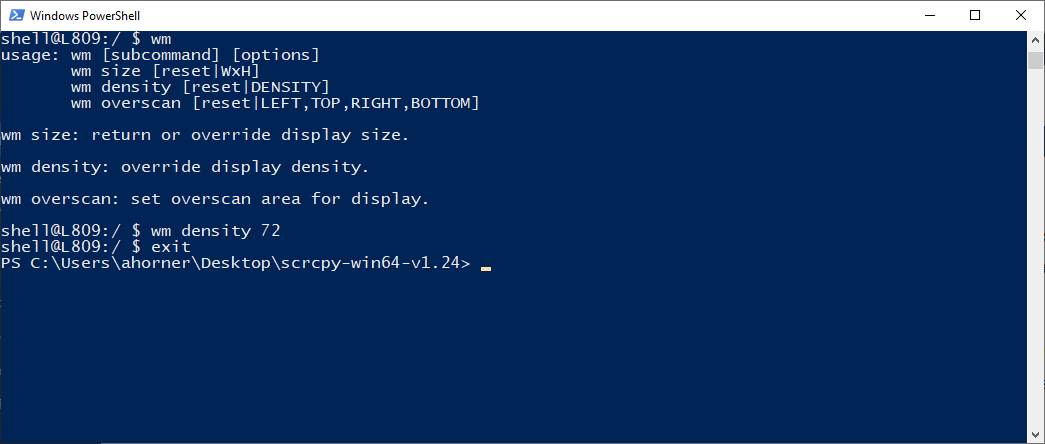
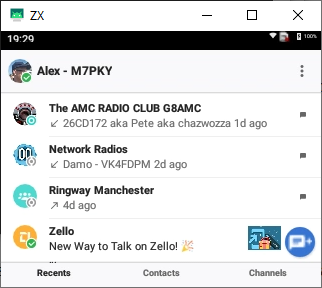
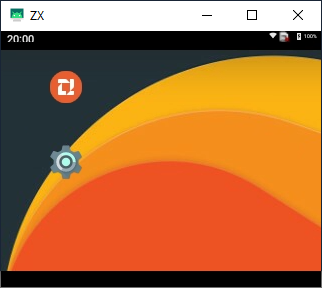
If we run scrcpy again (make sure to close it first), we will see things fit much better:
If you find the text to small, go back into the adb shell and change the size instead of the density, then restart scrcpy again. Here, I have reset the density and increased the size to 1920×1080:
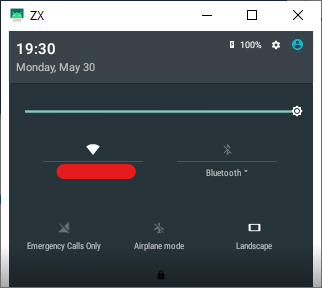
And as you can see, the system toggles are now much easier to access:
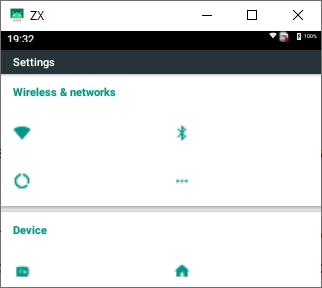
And if you have a little explore around, you’ll see you can click the settings god in the top right of the system toggles, and instead of getting the radio settings menu you’re used to, you get the full, proper Android 5.1.1 settings menu!
Running EchoLink
Now we have a way to access the radio using ADB, we can use ADB to install new apps! For this, I have decided to update the existing Zello app, and also install a new Launcher and also EchoLink.
For those who do not know, the Launcher app is the app which runs on your Android device to display the available list of apps on your home screen. The built in launcher on the radio, called Launcher3, limits the apps you can access to the radio settings screen and Zello, which is no good for us. My preferred Launcher for this device is Nova, which is what we will be installing today.
First of all, we need to download the apps we’re going to install. I personally got my apps from ApkPure.com however I do not endorse them and cannot guarantee the safety of any apps you download from them. I just know the ones I downloaded worked.
When downloading APK files, which are Android app files, make sure they are compatible with Android 5.1.1 or older. Any app which requires a newer version of Android will not work. For example, I had to download an old version of Nova, version 6.2.19, because this was the newest version capable of working with Android 5.1.1
Here are the links to the apps I downloaded:
- Zello – https://apkpure.com/zello-ptt-walkie-talkie/com.loudtalks
- Nova – https://apkpure.com/nova-launcher/com.teslacoilsw.launcher/download/62019-APK
- EchoLink – https://apkpure.com/echolink/org.echolink.android
I suggest you download these to the scrcpy folder for easy access using ADB. I would suggest you install all 3, as Nova Launcher or an alternative will absolutely be required to open apps other than settings and Zello, as the default Launcher3 launcher blocks other apps from showing.
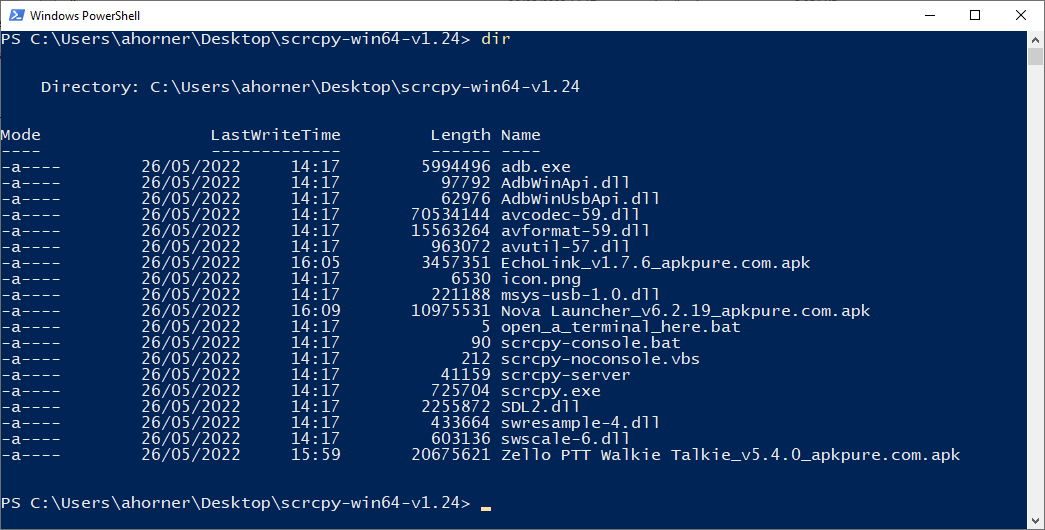
Going back to our PowerShell, if we run the dir command, we will see our APKs listed alongside the other scrcpy files:
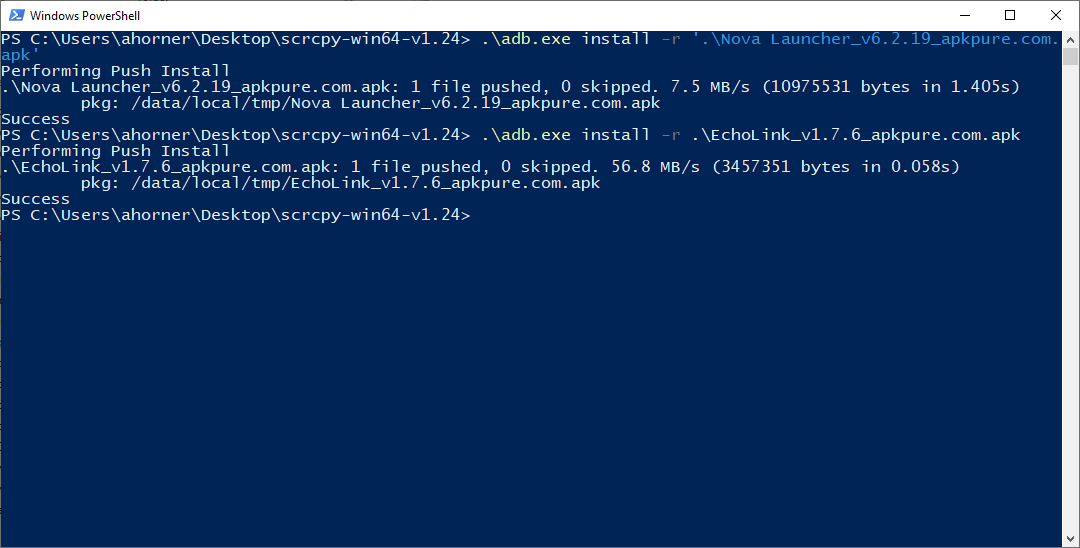
The first thing we’re going to do is update Zello! To do this, we must run the ADB install command, making sure to add -r which means Replace. This is because Zello is already installed and we want to replace it with a newer version. If we did not add the Replace option, ADB would refuse the install. If you include the Replace option when you don’t need to, it really doesn’t matter, an app will still install:

A little tip: You probably do not want to type all of the APK name out. Type the first word or two (making sure to get capital letters correct!) and hit the TAB key and PowerShell will type the rest out for you.
Next, let’s install Nova and EchoLink:
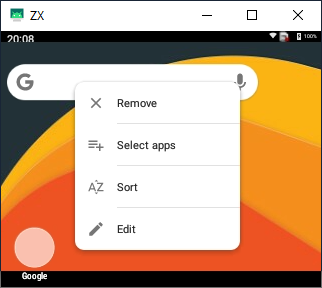
Now, all we need to do is set Nova to be our default launcher. Here is the old Launcher3:
Whilst on Launcher3, press the MENU button on the device. It may take one or two presses, but you should be presented with the Launcher Select menu:
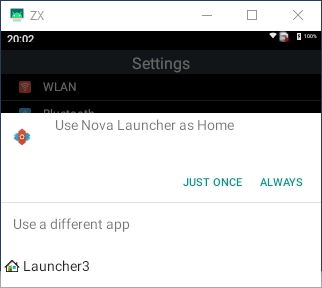
I am using scrcpy to control the radio here for convenience. Obviously, you want to select Nova here. Once you do so, you’ll be presented with the Nova welcome screen:
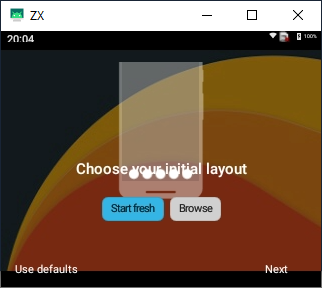
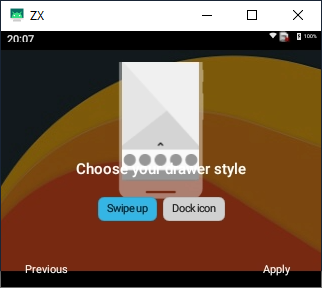
At this menu, I suggest you choose Start fresh then click Next. When you get to drawer style, you want to choose Swipe up because Dock Icon does not work:
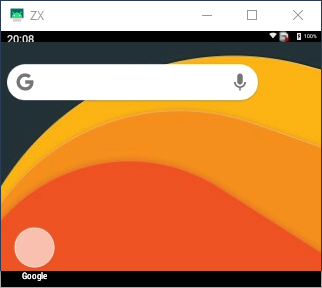
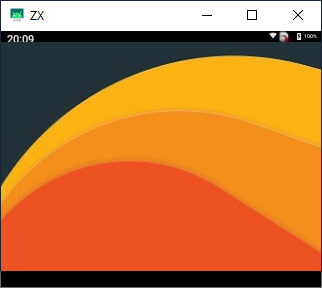
You will then be placed on the home screen. You can edit this using the mouse just like you would any other Android device. I decided to remove the search bar and default (broken) Google icon:
To access the app drawer, click and drag up from the bottom:
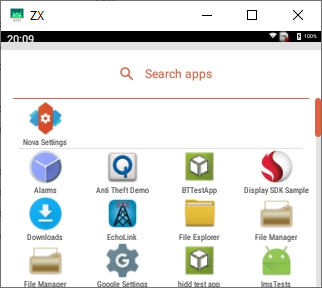
As you can see, theres actually quite a few apps here which would usually be hidden, including some Chinese social media apps, stock Android apps and various testing apps used in the factory for testing the device. You can scroll though these using the scroll wheel or by clicking and dragging.
As you can see, EchoLink is right there. Click and hold it until the home screen appears, then drag and drop it to a free spot like so:
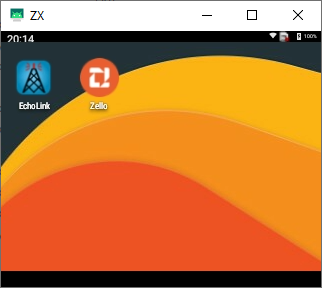
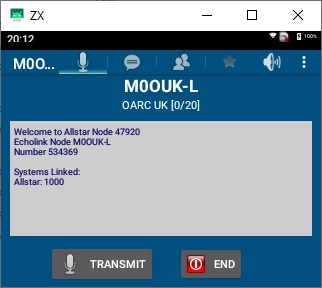
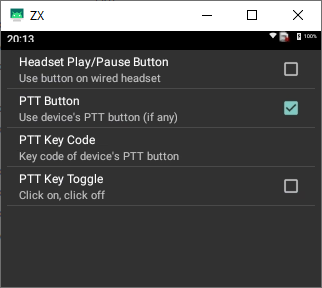
You can also go into the EchoLink settings, and if you enable PTT, the blue PTT button on the side of the radio will work!
Conclusion
This radio works very well if you set aside about an hour to do these customisations. Here are a few additional notes I would like to make:
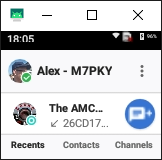
- When you first turn the radio on, Zello will start up automatically. I have not yet worked out how to stop this. Make sure you quit Zello before using EchoLink, otherwise your PTT button will trigger both! Do this from the 3 dots menu in the top right of Zello and click Exit!
- DO NOT turn of developer mode or USB debugging from settings. YOU WILL lock yourself out the radio and I DO NOT have any known way to get back in.
Thank you Ringway Manchester for your video on this radio, and for your continued interest in what I have achieved here! If anyone feels I have missed anything, feel free to contact me either via this website!
FAQ
- Can you update Android? I do not have the skillset required to do this, it would require someone experienced with Android at a low level to add support for the hardware in this radio to a newer version of Android.
- Can I add X app? If it supports the Android version on the radio, yes, otherwise no.
- Can you help me with X app? Not really, I don’t know individual apps particularly well and there’s plenty of guides online for various apps which would be able to help you much better than me!
- Can you help me fix or reflash my radio? I don’t have the recovery image from any manufacturer nor instructions on how to do this, nor any special key combos or other methods, sorry.
Excellent guide, I learnt so much and following your steps it work first time. Thank you taking the time to make this guide and do it so well. My KSUN is so much nicer to use.
Hi! I’m trying this with a TYT IP-77.
This device is apparently locked.
It doesn’t allow you to install applications and gives the message contact UNIPRO. It doesn’t allow me to do sudo either.
Has anyone managed to install Zello on this model?
follow up . same issue I have iqonic IP55w lock, stock on log in screen with user name and password, can not install anything. do any one has any idea on how to reflash the firmware of this unit.
thank you.
please send me and email for any solution
Tried all this with the ZL18 and it works! Thank you! SIM Card too with T-Mobile in USA Arizona!
hello, I have a poc zl10 it is not starting it stays on the screen that has the logo 4LITE, BUT IT DOES NOT START ANDROID. HELP
Hi, this has definitely made my life easier, I just need to know how to move sideways, I can literally only move up and down, so I can’t get to half the apps or settings on the device itself. Is there a way to program other buttons to move left and right? It’s fine through the computer, but I don’t really want to plug it in all the time
Hacia los lados te mueves con las teclas de abajo el triángulo y el triple triángulo las dos teclas del lado derecho abajo
I don’t know if you/ll see this, Stoph, but hopefully it will help someone anyway – Zello does not use the Contacts and Channels keys on the bottom row of the ZX’s keypad, so they act as left and right buttons instead.
Good job. My brick gets new funcionality, however Zello update failed. Error pointing on old SDK.
My Ruyage ZL50 has two extra side buttons. Any idea if we can use them anyhow?
I have followed and implemented what you have well studied. But I have not solved this problem: in this radio POC Zello I put a SIM (NT MOBILE) that forces me to activate data roaming to use the internet. I tried in many ways: installing system setting app, using ADB in command line to put the data_roaming variable to 1, but I can never set the system data roaming, and then I never have the network and I’m forced to use only WIFI. Do you have a suggestion? Thank you. Brown.
— Original Message:
Ho seguito e attuato quello che tu hai ben studiato.
Però non ho risolto questo problema: in questa radio POC Zello ho messo una SIM (NT MOBILE) che mi obbliga ad attivare il roaming dei dati per utilizzare internet.
Ho provato in tanti modi : installando app di setting di sistema, usando ADB in linea di comando per mettere a 1 la variabile data_roaming , ma non riesco mai settare il roaming dati del sistema, e quindi non ho mai la rete e sono costretto a utilizzare solo il WIFI.
Hai un suggerimento da propormi?
Ti ringrazio.
Bruno.
im in the usa and am also having this issue i tried to use the eiot sim card they claim plug and play yea right this thing is a nightmare haha if you ever find a solution please email me [email protected]
No luck? I’ve tried a couple sim cards, have a simpletalk on the way now to see if that one works… :-/
following up, i have tried redpocket, hologram, simpletalk, eiot club, and more, Hologram from their end (in the dashboard) sees that their is a data conenction, and has sent 10’s of kilabytes for a second or two about 3 times, but no actual data getting used from the radio. The sim cards are working, and the settings are ‘correct, even roaming’ but the radio doesnt like data off a sim.
Out of curiosity, has anybody ever managed to get roaming working with these ZX radios? I tried using mine with the original SIMs I got for them (Three network) and had no joy, so got O2 SIMs that worked fine, but then found that they didn’t work reliably on O2 network in a second location I want to use them – I’m hoping that multi-network SIMs will solve that problem, but I understand the handsets need to be able to successfully roam in order to switch networks at will…
Has anyone figured out how to get to the echolink favourites screen with the buttons?
73 de DH2SVZ
La misma consulta del colega alguien sabe cómo llegar favoritos en echolink
—
Same question from colleague, does anyone know how to get favorites on echolink?
I am going to purchase a zl10 and play around with it.
Have you figured out how to disable zello or change the default app that launches?
Wanting to put mumla on it as it’s version is android 4.0.
Getting mumla as default launching app would be sweet.
Hi,
Fantastic case. My KSUN ZL10 got a new life 🙂 .
Even the ZELLO app is much better after the update.
Using Echolink is a bit of a hassle with the keys 🙁 .
APRSdroid works perfectly. I installed the current version and it’s ok.
’73
Wlodek SQ6NLN
Saludos, como se puede cambiar el IMEI de este equipo?
—
Greetings, how can you change the IMEI of this computer?
what version of zello did u use mine said it was an old sdk and failed install
Hi, I just want to thank you for this, it works on a Ruyage ZL-50,
Kind regards Alan M1CBG
you werent able to get a sim card working on that radio were you?
adb shell pm uninstall -k –user 0 com.loudtalks
Best regards……….
I congratulate you for your contribution… with this article…
please can you tell me how to uninstall Zello…
Thank you…..
Hello! Thank you for your work. I have an TYT ip77 radio, provider ban the apk install. I try root device, not working. Please save and send your radio rom to my email address. Thank you!